Experiment Design Overview
The HyperStudy platform provides a powerful and flexible system for designing interactive experiments. This guide explains the core concepts and workflow for creating experiments.

The Experiment Designer
The Experiment Designer is a comprehensive interface for creating and configuring experiments. It provides tabs for managing all aspects of your experiment design, from basic settings to complex state flows.
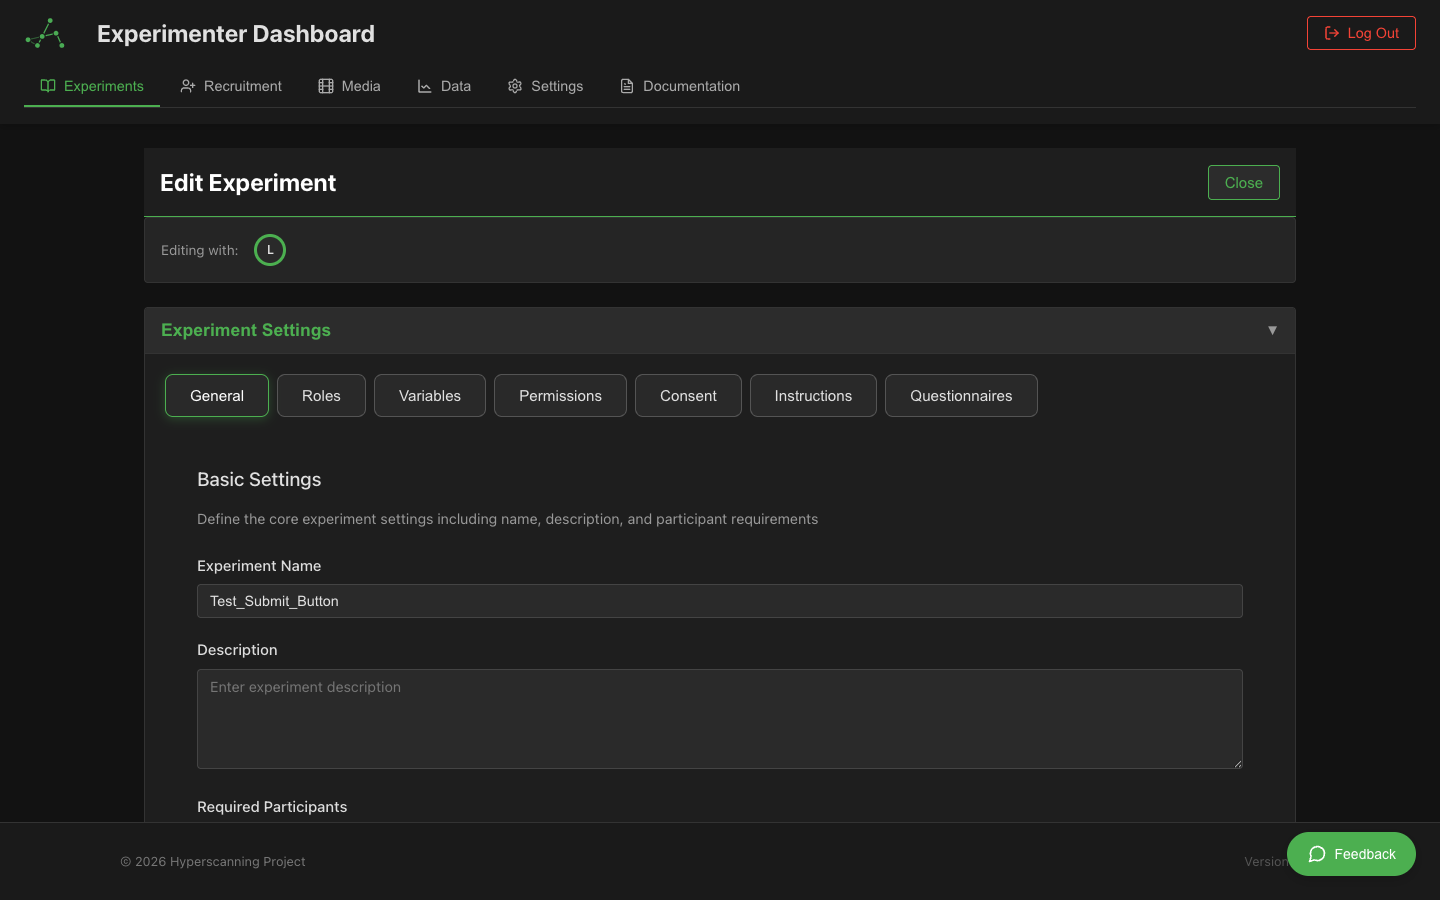
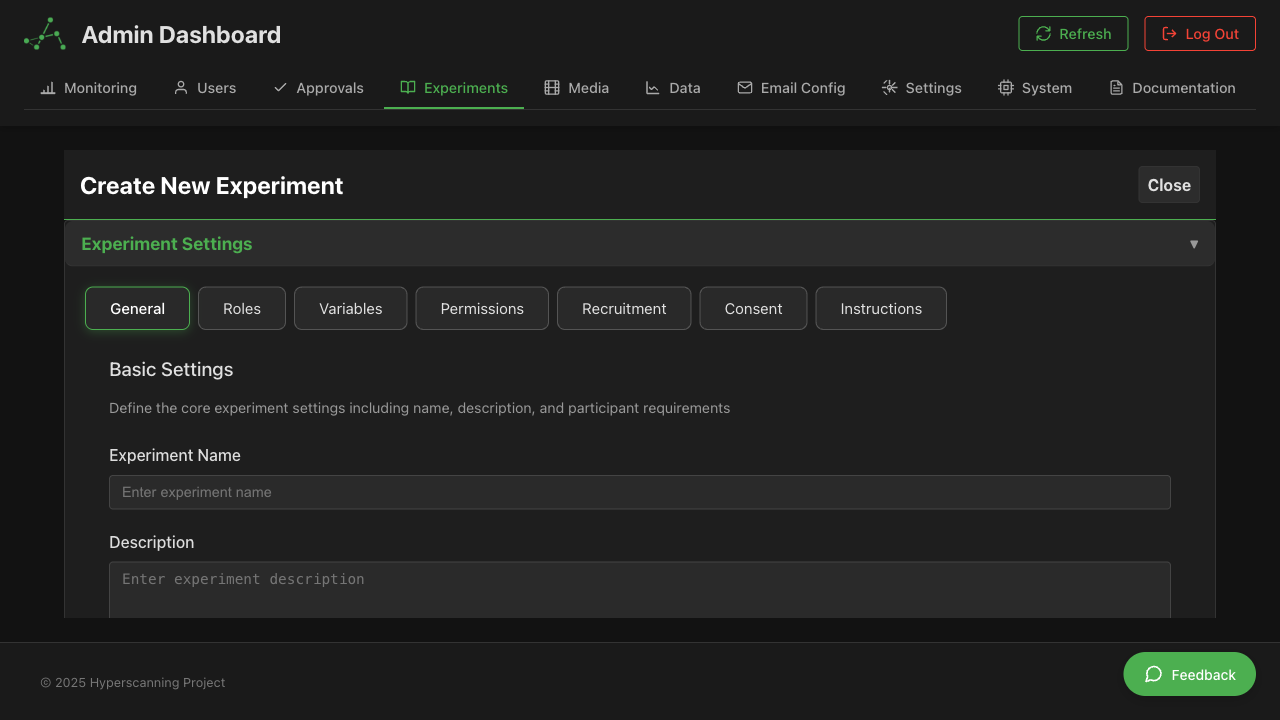 The experiment creation interface with tabs for General settings, Roles, Variables, Permissions, Recruitment, Consent, and Instructions
Instant Auto-Save
The Experiment Designer automatically saves your changes in real-time. There's no need for a manual "Save" button.
- Instant persistence: Changes are saved immediately as you make them
- No data loss: Even if your browser crashes, your work is preserved
- Visual feedback: A subtle indicator shows when changes are being saved
- Offline resilience: If you lose connection, changes queue locally and sync when reconnected
You don't need to manually save your experiment. Every change you make is automatically persisted to the server within milliseconds. Just edit and close when you're done.
Collaborative Editing
Multiple team members can work on the same experiment simultaneously.
Real-Time Collaboration
- See who's editing: The interface shows other editors currently working on the experiment
- Live updates: Changes from collaborators appear instantly in your view
- No conflicts: The system handles concurrent edits gracefully
Collaboration Best Practices
- Coordinate on major changes: Communicate with your team before restructuring states
- Work in different areas: Reduce conflicts by editing different states/sections
- Check who's online: Look for the editor indicators before making large changes
Permission checks are cached for 30 seconds for performance. If you're just granted access to an experiment, you may need to wait up to 30 seconds or refresh the page.
Core Concepts in Experiment Design
States
States are the fundamental building blocks of an experiment. Each state represents a distinct phase or screen in your experiment:
- Introduction State: Present instructions or welcome screens
- Stimulus State: Show videos, images, or other media
- Response State: Collect data through rating scales, text input, etc.
- Discussion State: Enable participant interaction through video chat or text
- Conclusion State: Thank participants or provide debriefing information
States flow from one to another based on participant actions and predefined sequences.
Components
Components are the interactive elements that participants see and interact with. HyperStudy offers two types:
-
Focus Components (State-specific): The main content for each state
- Media Components:
- Video Player (with synchronization)
- Image Display
- Text Display
- Audio Recording
- Input Components:
- Multiple Choice Questions
- Text Input
- VAS (Visual Analog Scale) Rating
- Continuous Rating
- Sparse Rating
- Rapid Rate (fast-paced rating)
- Ranking Component
- Special Components:
- Code Component (custom JavaScript)
- Trigger Component (hardware integration)
- Waiting Component
- Media Components:
-
Global Components: Elements that persist across multiple states
- Communication:
- Video Chat (via LiveKit)
- Text Chat
- Continuous Data Collection:
- Continuous Rating overlay
- Sparse Rating overlay
- Synchronized Media:
- Shared video controls
- Synchronized playback
- Communication:
Variables
Variables store data throughout the experiment. You can:
- Pre-define variables with initial values
- Capture participant responses into variables
- Use variables to control state transitions
- Set variable values based on participant actions
- Use variables in text content with expressions like
{variableName}
Variables make your experiments dynamic and responsive to participant behavior.
Roles
Roles define different participant experiences within the same experiment:
- Define custom roles (e.g., "Observer," "Participant," "Interviewer")
- Assign participants to roles
- Configure which components are visible to each role
- Set role-specific permissions (e.g., who can control media playback)
- Collect different data from different roles
Experiment Design Workflow
1. Planning Your Experiment
Before using the designer, plan your experiment:
- Define research questions and hypotheses
- Sketch the flow of states and transitions
- List required variables and how they'll be used
- Identify necessary roles and their permissions
2. Creating a New Experiment
- From your dashboard, click "New Experiment"
- Enter a name and description
- Configure basic settings:
- Maximum participants
- Default duration
- Visibility (private/group/public)
3. Building States
Add states, name them descriptively, and select a focus component for each one. See States and Flow Control for detailed guidance.
4. Setting Up Global Components
Enable global components (Video Chat, Text Chat, Continuous/Sparse Rating, etc.) and use the visibility matrix to control which states show them. See Component Overview for the full component reference.
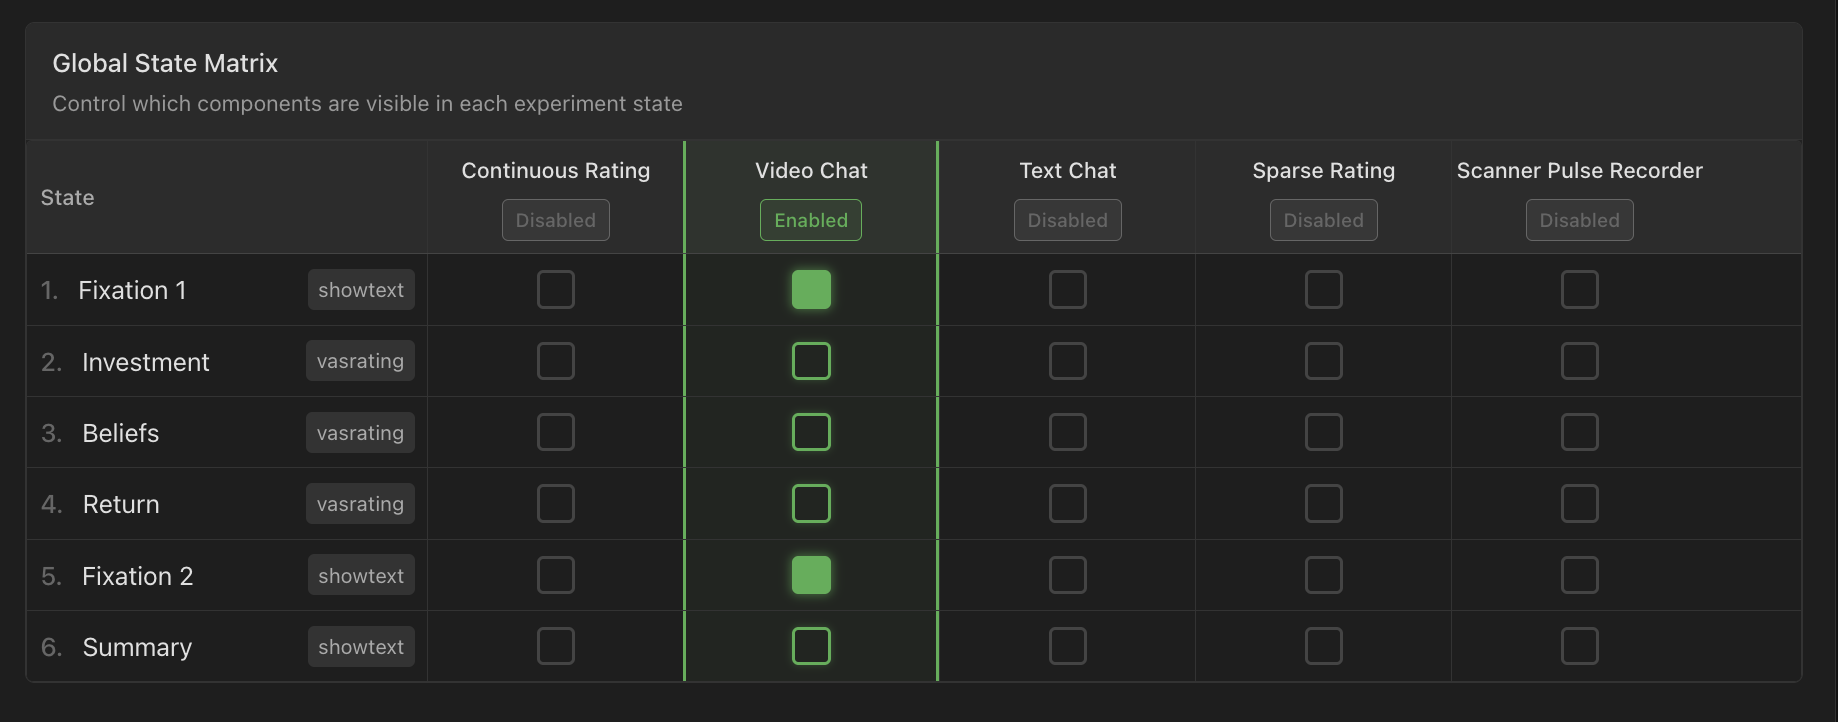 Global Components configuration showing the matrix view for state-by-state visibility control
5. Defining Variables
- Go to the "Variables" tab
- Add experiment variables with:
- Name
- Initial value
- Type (string, number, boolean, object)
- Description
6. Creating Roles
- Navigate to the "Roles" tab
- Define roles needed for your experiment (e.g., Participant A, Participant B, Observer)
- Configure for each role:
- Component visibility permissions
- Media control permissions
- Data collection settings
- Maximum participants allowed
- Set up role-specific experiences:
- Different question sets
- Unique media streams
- Customized interfaces
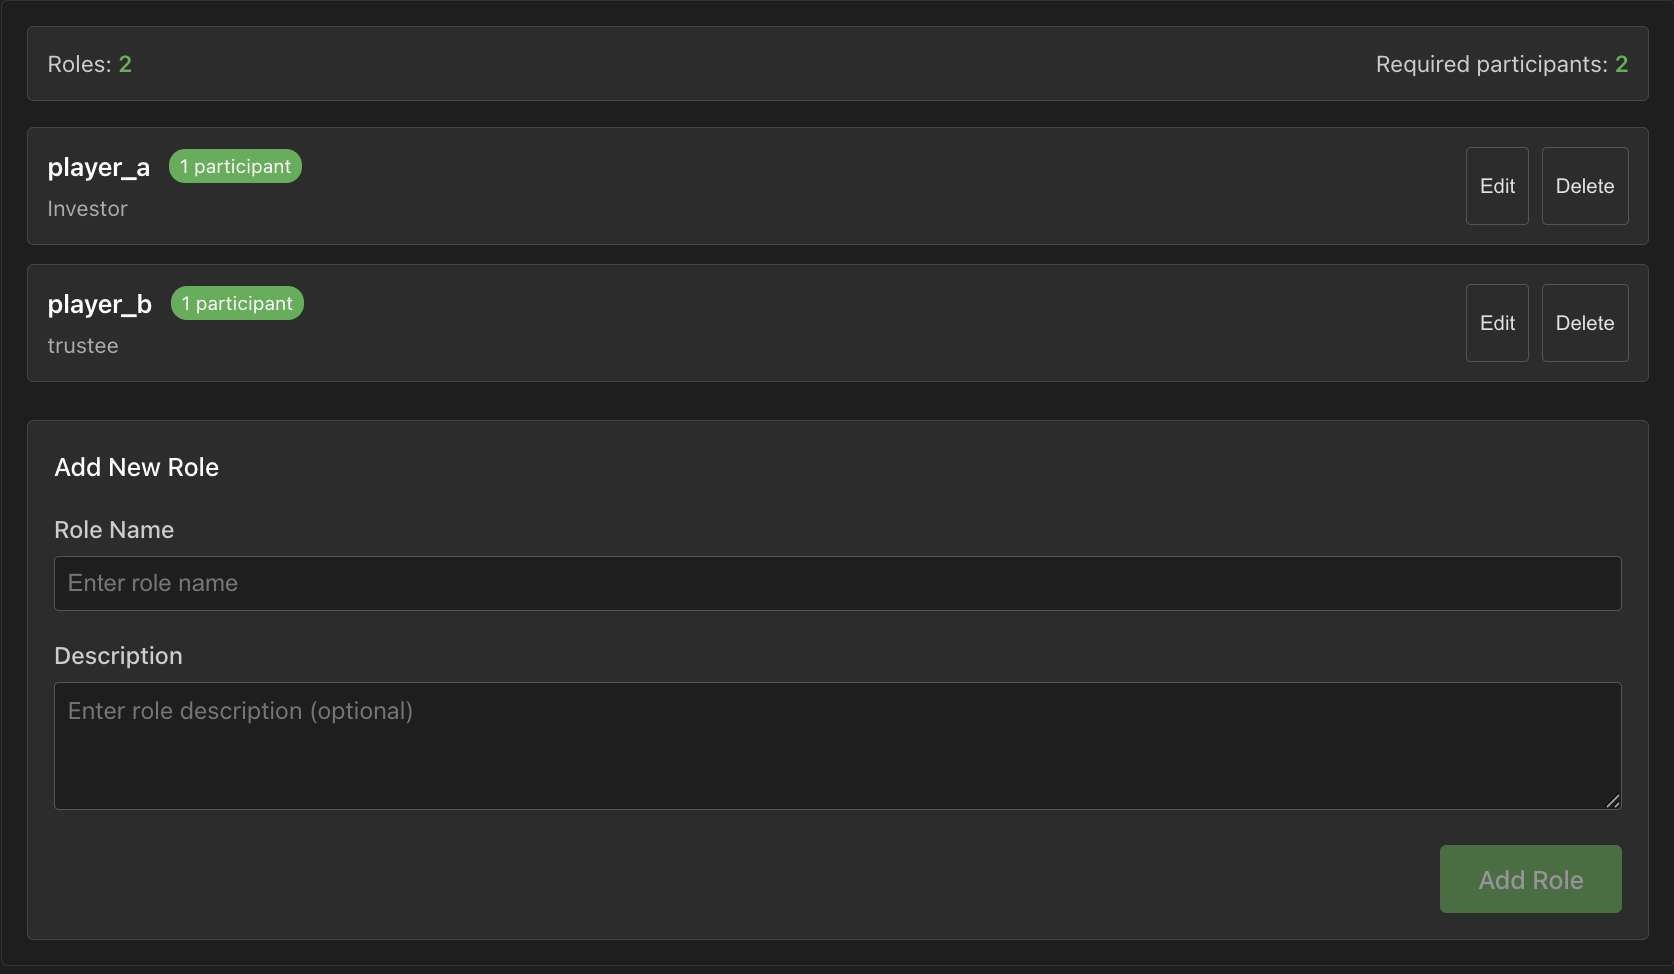 Roles configuration interface for managing participant roles and permissions
7. Setting Up Transitions
- Select a state in the state list
- Configure its "Next State" property
- Configure state advancement options
- Add timers or auto-advancement options if needed
8. Testing Your Experiment
Before recruiting participants:
- Test all transitions and interactions
- Verify data collection works as expected
- Check the experiment flow with different roles
Best Practices
State Design
- Keep states focused on a single task or concept
- Use clear, consistent naming for states
- Order states logically in the designer
- Include instruction states before complex interactions
Component Configuration
- Test media files before using them in experiments
- Ensure text is readable on all screen sizes
- Configure appropriate time limits
- Provide clear instructions within component content
Variables and Logic
- Use descriptive variable names
- Document the purpose of each variable
- Test state transitions thoroughly
- Consider edge cases in participant responses
Role Management
- Design roles with clear responsibilities
- Test the experiment from each role's perspective
- Ensure necessary permissions are granted to appropriate roles
- Balance the number of participants in each role
Next Steps
Now that you understand the basics of experiment design, explore these topics in depth: